一、实现思路
我们在写插件之前需要想清楚: 1. 网络资源只是一个请求链接不是真正的文件 2. 调用本地应用打开文件,这个文件是不是需要真实存在本地,才能打开。 3. 如果需要存在本地目录,那么应该存在什么样的目录。 想清楚之后我们来实现: 首先我来说下我的实现思路: 点击请求链接 ---> 获取请求链接 ---> 根据链接下载网络资源到本地 ---> 调用自定义插件 ---> 调用本地应用打开下载到本地的资源文件
二、动手实践
1. 编写自定义的插件:
1.使用plugman创建自己的自定义插件,并添加android平台 2.编辑调用的openFile.js
js
const exec = require('cordova/exec');
exports.openFile = function (param, success, error) {
    exec(success, error, 'OpenFilePlugin', 'openFile', [param]);
};
3.编辑实现的功能的java类
java
package com.ai.ced.openfile;

import android.app.Activity;
import android.content.Intent;
import android.net.Uri;
import android.support.v4.content.FileProvider;

import org.apache.cordova.CordovaPlugin;
import org.apache.cordova.CallbackContext;

import org.json.JSONArray;
import org.json.JSONException;

import java.io.File;

/**
 * This class echoes a string called from JavaScript.
 */
public class OpenFilePlugin extends CordovaPlugin {

    public static Activity activity;

    @Override
    public boolean execute(String action, JSONArray args, CallbackContext callbackContext) throws JSONException {
        if (action.equals("openFile")) {
            String message = args.getString(0);
            this.openFile(message, callbackContext);
            return true;
        }
        return false;
    }

    private void openFile(String message, CallbackContext callbackContext) {
        this.activity = this.cordova.getActivity();
//        this.openAndroidFile("/storage/emulated/0/ReleaseChannel.txt");

        this.openAndroidFile(message);
    }

    public  void openAndroidFile(String filepath){
        Intent intent = new Intent();
        File file = new File(filepath);
//        intent.addFlags(Intent.FLAG_ACTIVITY_NEW_TASK);//设置标记
        Uri uri = FileProvider.getUriForFile(activity,
        BuildConfig.APPLICATION_ID + ".fileProvider",
        file);

        intent.addFlags(Intent.FLAG_GRANT_READ_URI_PERMISSION);
        intent.setAction(Intent.ACTION_VIEW);//动作,查看
//        intent.setDataAndType(Uri.fromFile(file), this.getMIMEType(file));//设置类型
        intent.setDataAndType(uri, this.getMIMEType(file));//设置类型
        this.activity.startActivity(intent);
    }


    private String getMIMEType(File file) {

        String type="*/*";
        String fName = file.getName();
        //获取后缀名前的分隔符"."在fName中的位置。
        int dotIndex = fName.lastIndexOf(".");
        if(dotIndex < 0)
            return type;
        /* 获取文件的后缀名 */
        String fileType = fName.substring(dotIndex,fName.length()).toLowerCase();
        if(fileType == null || "".equals(fileType))
            return type;
        //在MIME和文件类型的匹配表中找到对应的MIME类型。
        for(int i=0;i<MIME_MapTable.length;i++){
            if(fileType.equals(MIME_MapTable[i][0]))
                type = MIME_MapTable[i][1];
        }
        return type;
    }


    private static final String[][] MIME_MapTable={
            //{后缀名,    MIME类型}
            {".3gp",    "video/3gpp"},
            {".apk",    "application/vnd.android.package-archive"},
            {".asf",    "video/x-ms-asf"},
            {".avi",    "video/x-msvideo"},
            {".bin",    "application/octet-stream"},
            {".bmp",      "image/bmp"},
            {".c",        "text/plain"},
            {".class",    "application/octet-stream"},
            {".conf",    "text/plain"},
            {".cpp",    "text/plain"},
            {".doc",    "application/msword"},
            {".docx",    "application/msword"},
            {".exe",    "application/octet-stream"},
            {".gif",    "image/gif"},
            {".gtar",    "application/x-gtar"},
            {".gz",        "application/x-gzip"},
            {".h",        "text/plain"},
            {".htm",    "text/html"},
            {".html",    "text/html"},
            {".jar",    "application/java-archive"},
            {".java",    "text/plain"},
            {".jpeg",    "image/jpeg"},
            {".JPEG",    "image/jpeg"},
            {".jpg",    "image/jpeg"},
            {".js",        "application/x-javascript"},
            {".log",    "text/plain"},
            {".m3u",    "audio/x-mpegurl"},
            {".m4a",    "audio/mp4a-latm"},
            {".m4b",    "audio/mp4a-latm"},
            {".m4p",    "audio/mp4a-latm"},
            {".m4u",    "video/vnd.mpegurl"},
            {".m4v",    "video/x-m4v"},
            {".mov",    "video/quicktime"},
            {".mp2",    "audio/x-mpeg"},
            {".mp3",    "audio/x-mpeg"},
            {".mp4",    "video/mp4"},
            {".mpc",    "application/vnd.mpohun.certificate"},
            {".mpe",    "video/mpeg"},
            {".mpeg",    "video/mpeg"},
            {".mpg",    "video/mpeg"},
            {".mpg4",    "video/mp4"},
            {".mpga",    "audio/mpeg"},
            {".msg",    "application/vnd.ms-outlook"},
            {".ogg",    "audio/ogg"},
            {".pdf",    "application/pdf"},
            {".png",    "image/png"},
            {".pps",    "application/vnd.ms-powerpoint"},
            {".ppt",    "application/vnd.ms-powerpoint"},
            {".pptx",    "application/vnd.ms-powerpoint"},
            {".prop",    "text/plain"},
            {".rar",    "application/x-rar-compressed"},
            {".rc",        "text/plain"},
            {".rmvb",    "audio/x-pn-realaudio"},
            {".rtf",    "application/rtf"},
            {".sh",        "text/plain"},
            {".tar",    "application/x-tar"},
            {".tgz",    "application/x-compressed"},
            {".txt",    "text/plain"},
            {".wav",    "audio/x-wav"},
            {".wma",    "audio/x-ms-wma"},
            {".wmv",    "audio/x-ms-wmv"},
            {".wps",    "application/vnd.ms-works"},
            //{".xml",    "text/xml"},
            {".xml",    "text/plain"},
            {".z",        "application/x-compress"},
            {".zip",    "application/zip"},
            {"",        "*/*"}
    };
}
到这主要的功能就已经完成了。
三、怎么调用
1.在ionic项目中需要配合File、FileTransfer进行使用。既然需要组合,那我们写一个工具service。
ts
import { Injectable } from '@angular/core';
import { FileTransferObject, FileTransfer } from '@ionic-native/file-transfer';
import { File } from '@ionic-native/file';
import { CommonUtilService } from './commonUtilService';

declare let OpenFilePlugin: any;

/*
  Generated class for the WechatShareServiceProvider provider.

  See https://angular.io/guide/dependency-injection for more info on providers
  and Angular DI.
*/

@Injectable()
export class OpenFileService {

  constructor(private transfer: FileTransfer,
              private comUtil: CommonUtilService,
              private file: File) {}


  openFile(url: string){
    console.log("OpenFileService enter");
    const fileTransfer: FileTransferObject = this.transfer.create();
    // const url = 'http://www.gz10010.shop/resource/download/1111111111111111111111.pdf';
    // 获取文件名1111111111111111111111.pdf
    let tempUrl = url.substr(url.lastIndexOf("/")+1);
    // 获取存储路径
    // this.file.externalCacheDirectory获取对应app的缓存路径file:///storage/emulated/0/Android/data/io.ionic.starter/cache/
    // 需要去掉 file:/// 如果不去掉会报路径找不到该路径
    // /storage/emulated/0/Android/data/io.ionic.starter/cache/ 正确路径
    let storeUrl = this.file.externalCacheDirectory.substr(7);
    fileTransfer.download(url, storeUrl + tempUrl).then( (data) => {
      // 拼接打开的文件路径
      let openUrl = storeUrl + tempUrl;
      OpenFilePlugin.openFile(openUrl);
    }).catch( err => {
      this.comUtil.showAlert({title: "文件下载失败", message: JSON.stringify(err)});
    });
  }
}
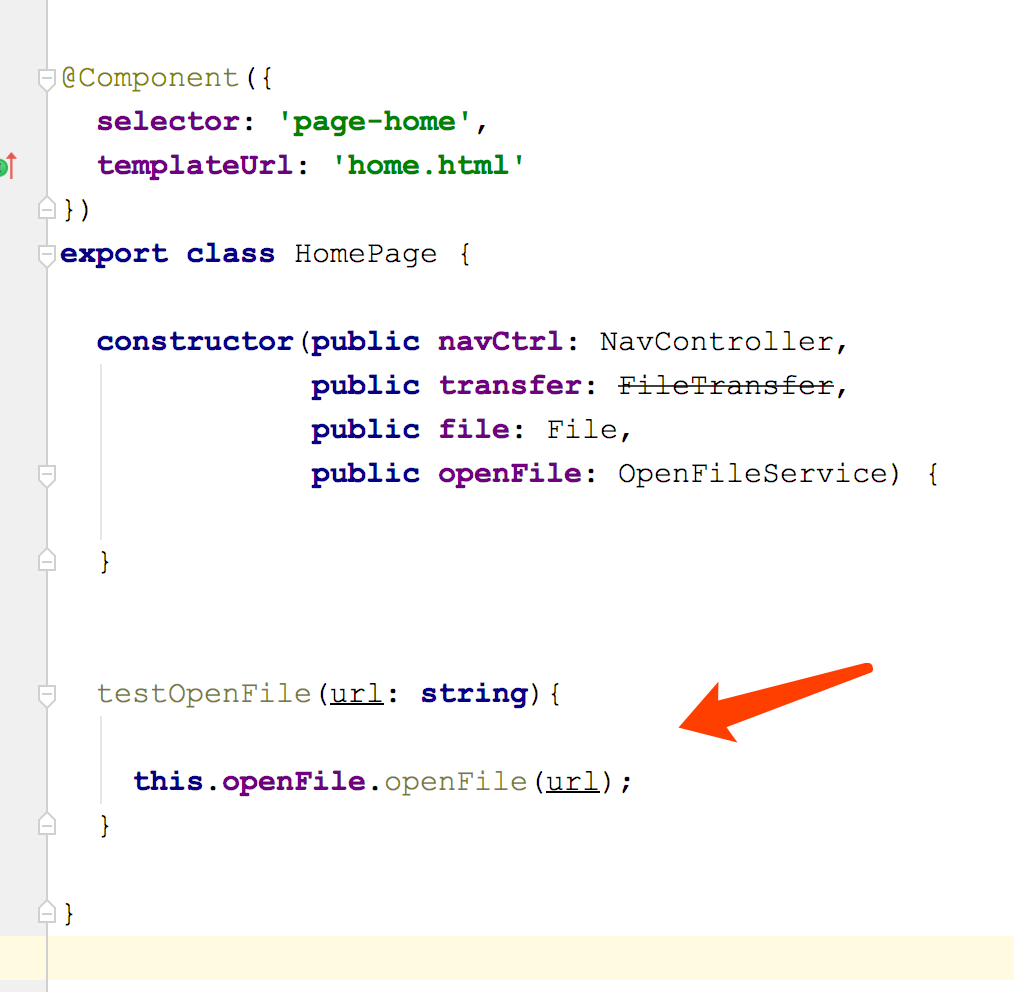
2. 业务调用


四、问题解决
1. 真机下:android.os.FileUriExposedException:exposed beyond app through Intent.getData()
方案一: 1.在AndroidManifest.xml文件的application里添加
xml
<provider
               android:name="android.support.v4.content.FileProvider"
               android:authorities="app的包名.fileProvider"
               android:grantUriPermissions="true"
               android:exported="false">
              <meta-data
                                android:name="android.support.FILE_PROVIDER_PATHS"
                                android:resource="@xml/file_paths"/>
</provider>
2.在res目录下新建一个xml文件夹,并且新建一个file_paths的xml文件 3.打开file_paths.xml文件添加如下内容
<?xml version="1.0" encoding="utf-8"?>
<paths>
             <external-path path="Android/data/app的包名/" name="files_root"/>
             <external-path path="." name="external_storage_root"/>
</paths>
方案二: 在MainActivity的onCreate方法中添加如下代码
        if (Build.VERSION.SDK_INT >= Build.VERSION_CODES.N) {
            StrictMode.VmPolicy.Builder builder = new StrictMode.VmPolicy.Builder();
            StrictMode.setVmPolicy(builder.build());
        }
2. 编译报:Didn't find class "android.support.v4.content.FileProvider" on path:
添加v4依赖包,重新clean、rebuild 
3. 权限问题
xml
    <uses-permission android:name="android.permission.MOUNT_UNMOUNT_FILESYSTEMS" />
    <uses-permission android:name="android.permission.READ_EXTERNAL_STORAGE" />
    <uses-permission android:name="android.permission.BLUETOOTH" />
    <uses-permission android:name="android.permission.WRITE_EXTERNAL_STORAGE" />
    <uses-permission android:name="android.permission.BLUETOOTH_ADMIN" />
    <uses-permission android:name="android.permission.CAMERA" />
    <uses-permission android:name="android.permission.READ_PHONE_STATE" />
    <uses-permission android:name="android.permission.INTERNET" />
    <uses-permission android:name="android.permission.VIBRATE" />
    <uses-feature android:name="android.hardware.camera.autofocus" />
    <uses-permission android:name="android.permission.FLASHLIGHT" />
    <uses-feature android:name="android.hardware.camera" android:required="true" />
    <uses-permission android:name="android.permission.ACCESS_COARSE_LOCATION" />
    <uses-permission android:name="android.permission.ACCESS_FINE_LOCATION" />
    <uses-permission android:name="android.permission.ACCESS_WIFI_STATE" />
    <uses-feature android:name="android.hardware.location.gps" />
    <uses-permission android:name="android.permission.NFC" />
    <uses-feature android:name="android.hardware.nfc" android:required="true" />
    <uses-permission android:name="android.permission.MANAGE_DOCUMENTS" />
    <uses-permission android:name="android.permission.RECORD_AUDIO" />
    <uses-permission android:name="android.permission.ACCESS_NETWORK_STATE" />