一、主应用-中央控制器
主应用:整体控制所有子应用的加载、更新、卸载整个流程,也是连接子应用和微前端框架的工具,同时所有公共的依赖都是放在主应用中,然后对外提供修改的方法。
主应用可以做的事情:
- 加载其他应用
- 导航菜单
- 用户信息
- 用户权限管理
- 等等
1. 主应用的搭建
项目创建
- 使用
vue-cli创建vue3技术栈的 主应用main
- 使用
导航菜单的搭建
- 在
src/views/Home.vue添加以下 DOM 节点。vue<template> <div class="nav"> <ul> <!-- class="cur" --> <li v-for="(nav, index) of NAV_LIST" :key="index" :class="{'cur': currentIndex === index}" @click="setCurrentIndex(index)" > <a>{{nav.name}}</a> </li> </ul> </div> </template> <script setup> import { ref } from 'vue' const NAV_LIST = [ { name: '首页', url: '/' }, { name: 'vue2子应用', url: '/vue2' }, { name: 'vue3子应用', url: '/vue3' } ] const currentIndex = ref(0) const setCurrentIndex = (index) => { currentIndex.value = index } </script> <style scoped lang='less'> .nav { background-color: #00978e; ul { width: 1200px; height: 60px; margin: 0 auto; list-style: none; li { float: left; width: 150px; text-align: center; line-height: 60px; &.cur { background-color: #015e58; } a { display: block; width: 150px; color: white; font-size: 16px; text-decoration: none; } } } } </style>
- 在
重置浏览器样式,添加如下插件,并在 main.js 中引入
import 'normalize.css/normalize.css'shellnpm install normalize.css -S将静态的导航转化成动态形式
- 定义导航数组javascript
const NAV_LIST = [ { name: '首页', url: '/' }, { name: 'vue2子应用', url: '/vue2' }, { name: 'vue3子应用', url: '/vue3' } ] - DOM 遍历vue
<li v-for="(nav, index) of NAV_LIST" :key="index" :class="{'cur': currentIndex === index}" @click="setCurrentIndex(index)" > <a>{{nav.name}}</a> </li> - 动态切换菜单javascript
const currentIndex = ref(0)

const setCurrentIndex = (index) => {
  currentIndex.value = index
}
- 定义导航数组
布局文件
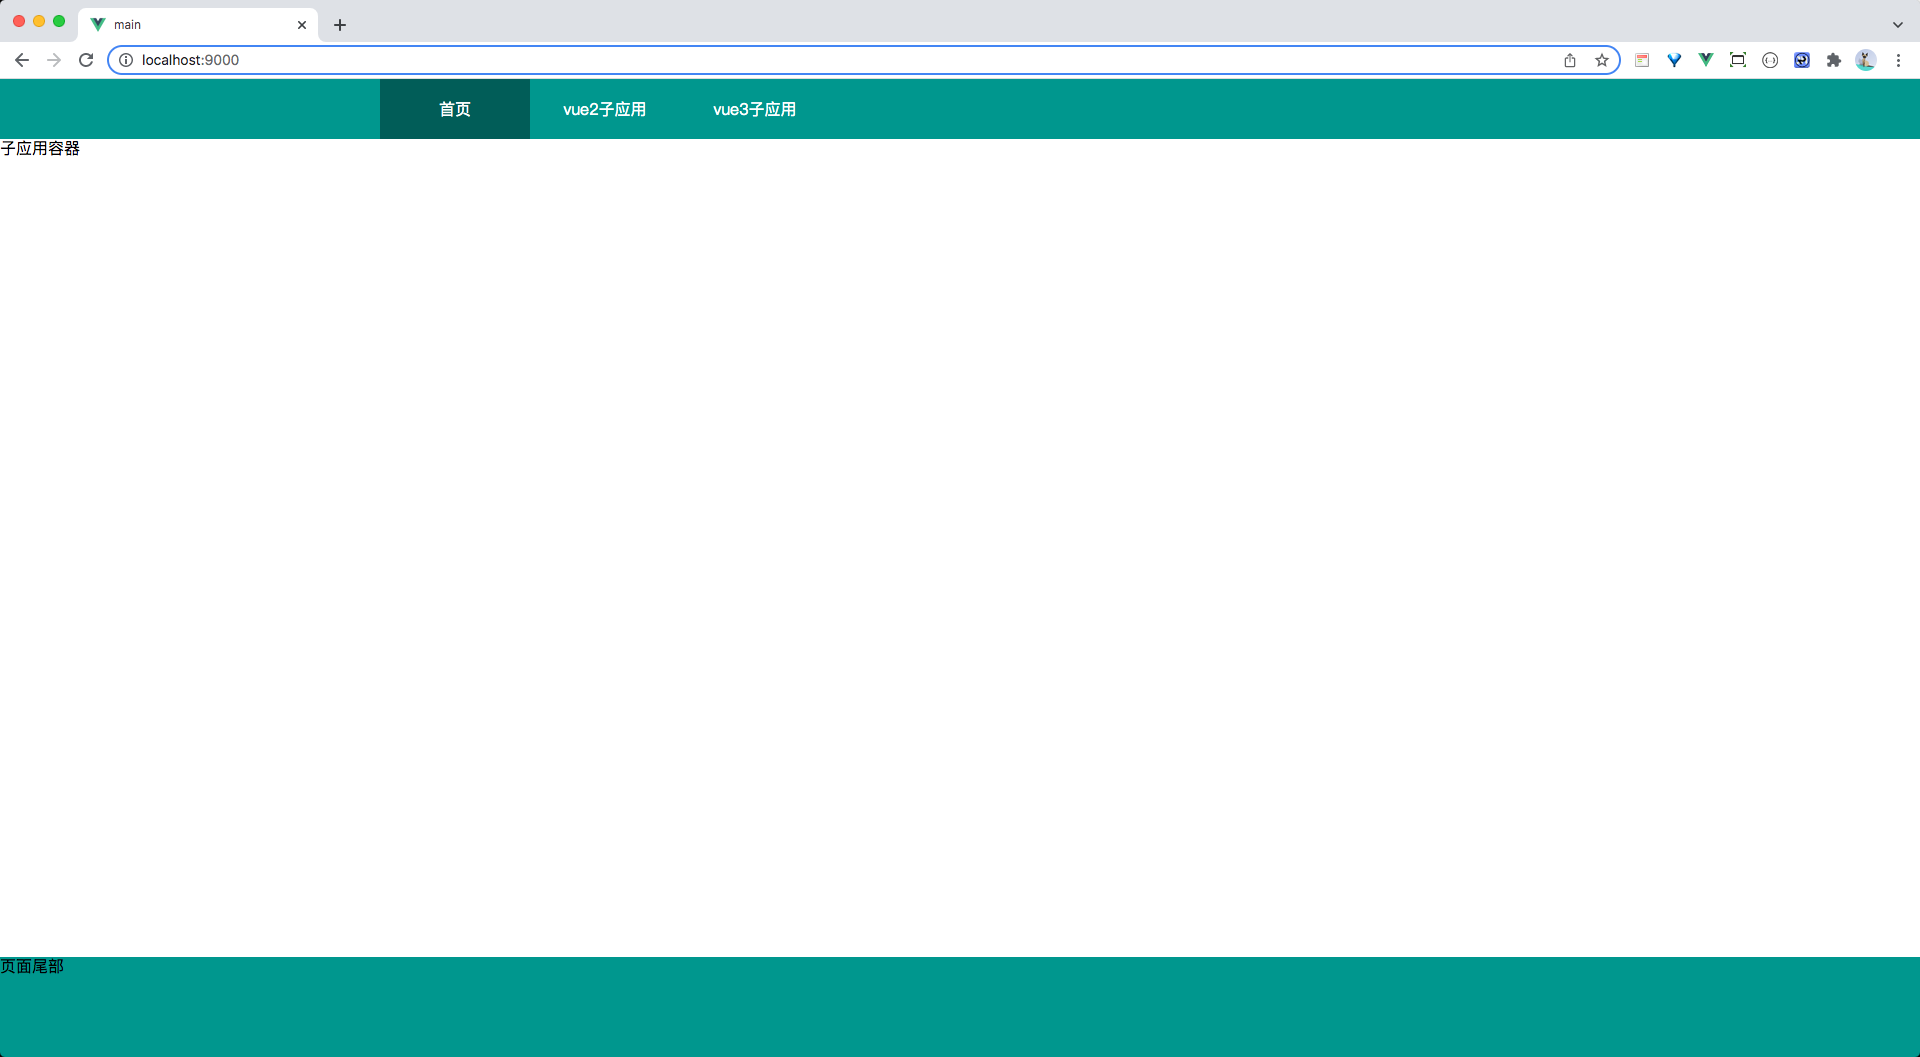
views/Home.vuevue<template> <div class="app-wrapper"> <div class="header-container"> <Header/> </div> <div class="main-container"> <!-- 子应用容器 --> <div class="child-container"> 子应用容器 </div> </div> <div class="footer-container">页面尾部</div> </div> </template> <script setup> import Header from './components/Header.vue' </script> <style scoped lang='less'> .app-wrapper { overflow: hidden; .header-container { flex-basis: 60px; } .main-container { height: calc(100vh - 160px); position: relative; .child-container { position: relative; } } .footer-container { background-color: #00978e; height: 100px; } } </style>重启项目,效果如下

添加切换菜单的 Loading 组件,作用于子应用之间的切换
- 新建
src/components/Loading.vuevue<template> <div class="component-loading"> <div class="loader"> <div class="loading-spinner"> <svg class="circular" viewBox="25 25 50 50"> <circle class="path" cx="50" cy="50" r="20" fill="none" /> </svg> </div> </div> </div> </template> <style scoped lang='less'> .component-loading { position: absolute; left: 0; right: 0; top: 0; bottom: 0; display: flex; justify-content: center; align-items: center; background-color: rgba(255, 255, 255, 0.9); .circular { width: 42px; height: 42px; animation: loading-rotate 2s linear infinite; } .path { animation: loading-dash 1.5s ease-in-out infinite; stroke-dasharray: 90, 150; stroke-dashoffset: 0; stroke-width: 2; stroke: #20a0ff; stroke-linecap: round; } } @keyframes loading-rotate { 100% { transform: rotate(360deg); } } @keyframes loading-dash { 0% { stroke-dasharray: 1, 200; stroke-dashoffset: 0; } 50% { stroke-dasharray: 90, 150; stroke-dashoffset: -40px; } 100% { stroke-dasharray: 90, 150; stroke-dashoffset: -120px; } } </style> - 在
Home.vue中添加
vue<div class="main-container"> <Loading/> <!-- 子应用容器 --> <div class="child-container"> 子应用容器 </div> </div>javascript<script setup> import Loading from '@/components/Loading.vue' </script>- 新建
配置子应用路由
- 在
main/src/ronter/index.js文件中配置javascriptconst routes = [ { path: '/', name: 'Home', component: Home }, { path: '/vue2', component: () => import('../views/Home') }, { path: '/vue3', component: () => import('../views/Home') } ]
- 在